When it comes to building a scalable, systematized website in WordPress, it’s essential to keep things organized.
CSS is one thing that—when configured improperly—can get disorganized fast.
At Tilted Chair, we’re turning the corner on 500 WordPress websites in almost 15 years of business. Over that time, we’ve developed a great system for organizing and editing CSS that keeps things nice and tidy—and fast.
What is CSS?
“CSS” stands for “Cascading Style Sheets.” The key word here is cascading.
This essentially means that CSS selectors that appear later in a stylesheet override selectors that precede them. This is very important: if there are conflicting CSS directives, the one that appears last in the file is the one that will render. (There’s an important exception here: if the property “!important” appends the first CSS directive, that one will still prevail. The conflicting directive—even though it appears later in the stylesheet—will be ignored.)
The wrong ways to add/edit CSS in WordPress
The curious WordPress users have probably found two ways of adding/editing CSS that might seem reasonable. But there are good reasons that they are not.
Appearance > Customize > Additional CSS
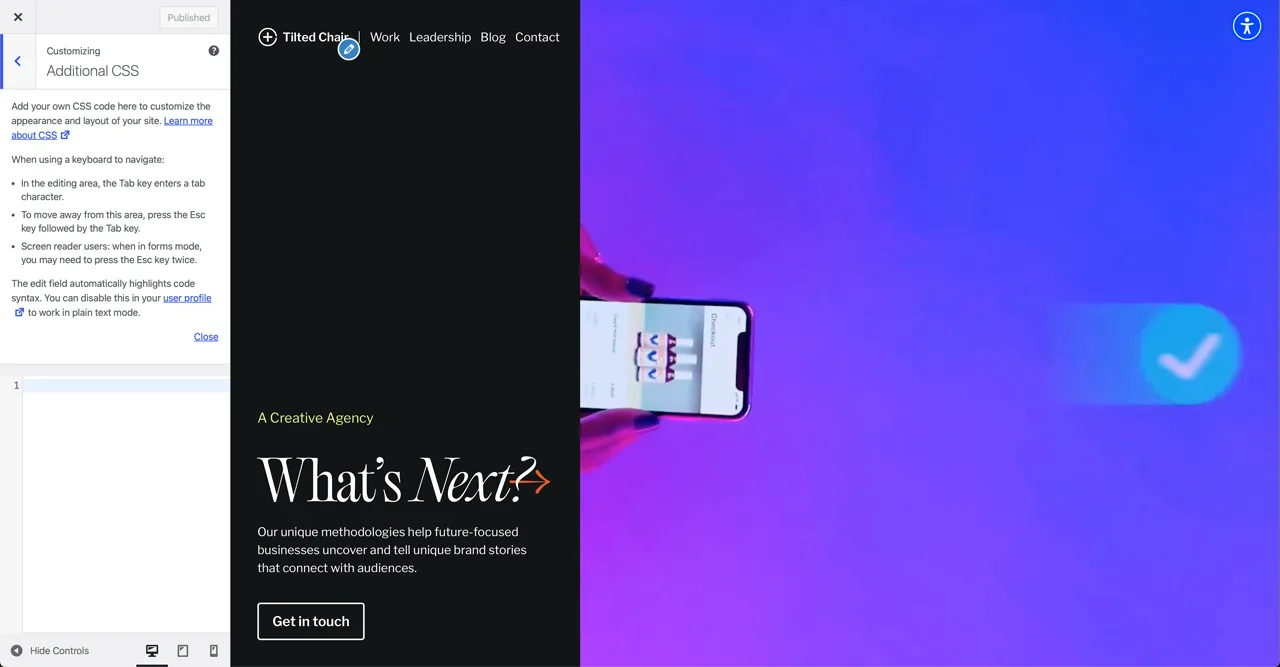
While enticing, this option does nothing but plop the CSS into the <head></head> of the website. This is effectively inline styling of web elements, which defeats the purpose of using external CSS stylesheets completely. This also simply adds heft to your CSS, because it doesn’t eliminate the CSS that’s present in the theme’s stylesheets. It writes over those CSS directives, creating unnecessary conflicts.
Lastly, adding CSS here doesn’t allow for the styling to be divided into more manageable and logical sections. (More on that later.)
Appearance > Theme File Editor > Stylesheet
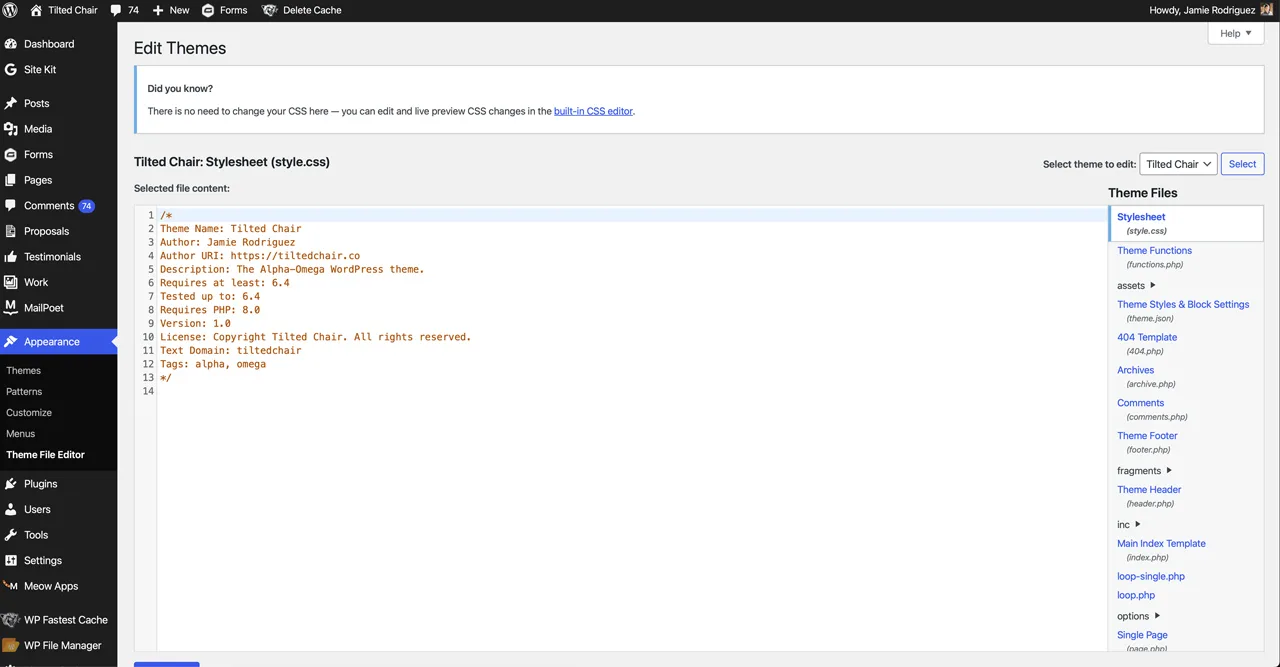
When building a vanilla HTML/CSS website (one not integrated into WordPress), this is customarily where the CSS would be added/edited. But notice when you open this file for the first time in WordPress, you get a warning that there’s no need to edit CSS here:
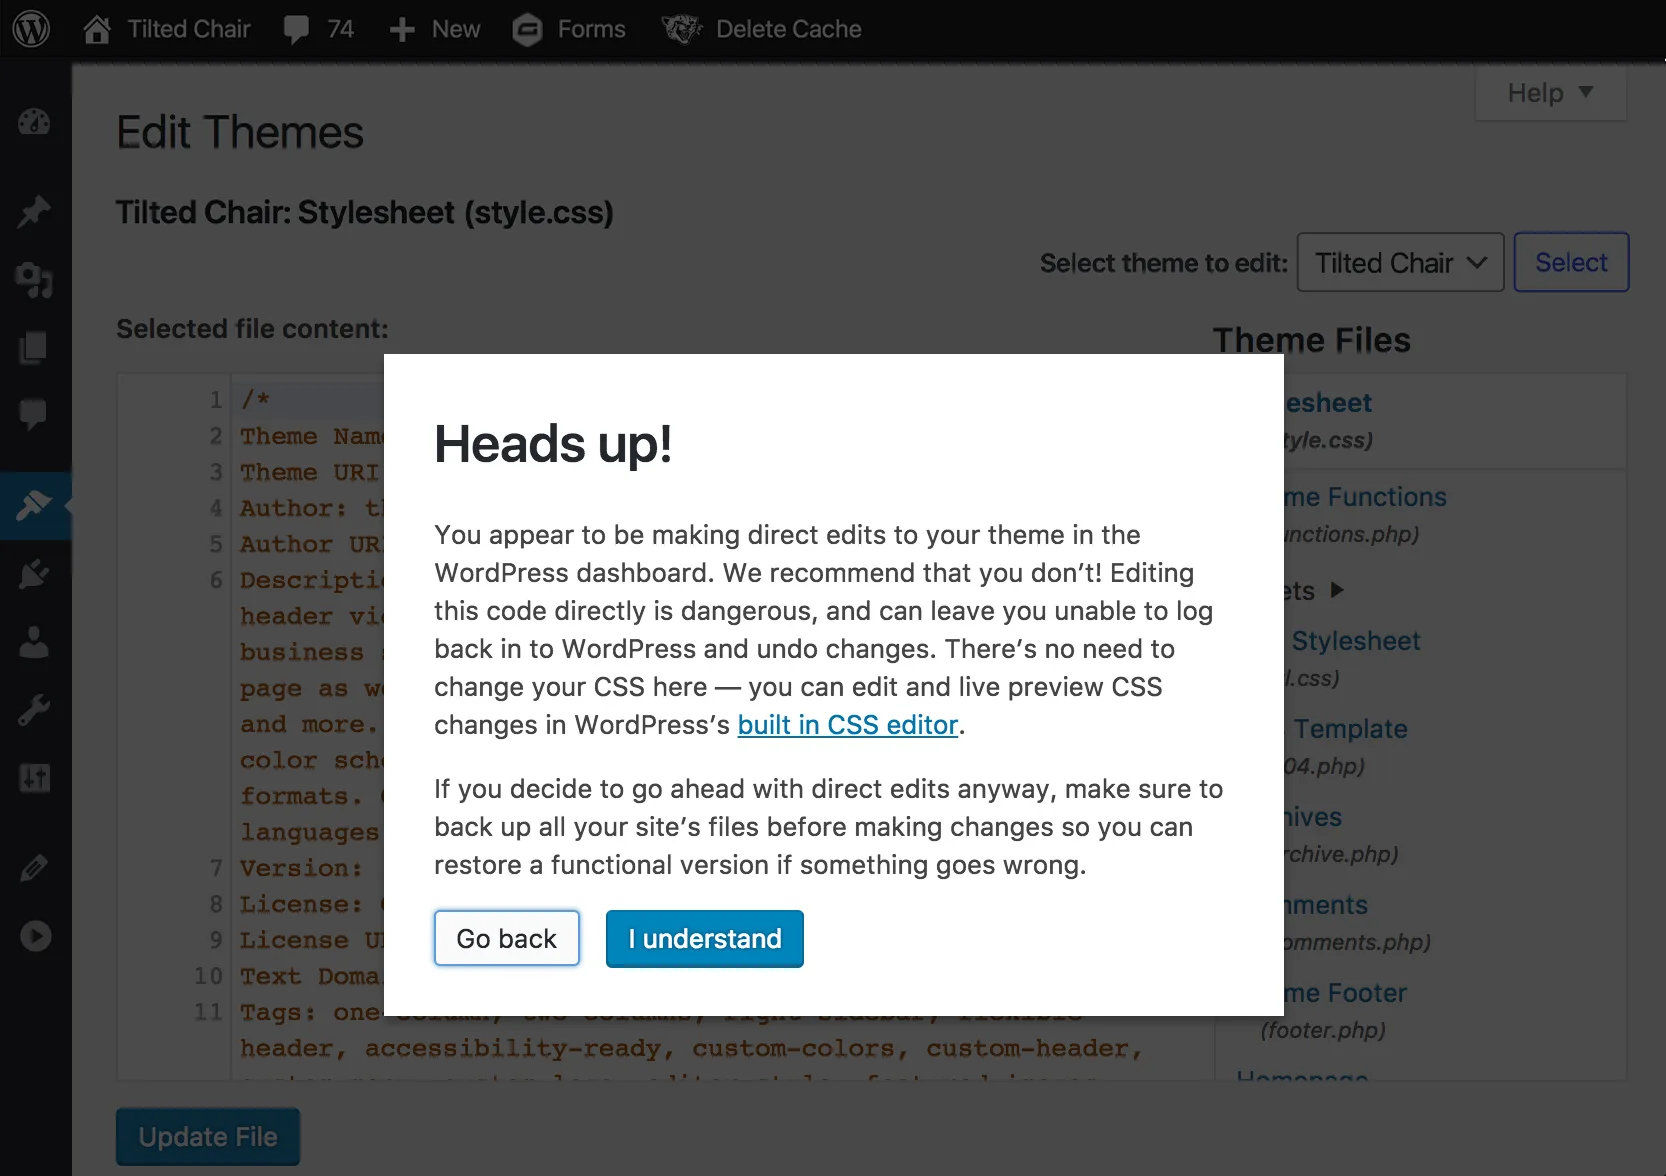
You have to click “I understand” to bypass this warning and edit the default style.css file.
For a lot of the same reasons that adding/editing CSS in the Additional CSS interface above is a bad idea, it’s a bad idea to do so here as well: it’s not divisible into smaller/logical groups of CSS, it adds to the aggregate size of CSS data rendered on the site, it creates CSS redundancies, etc.
The right way to add, edit, and organize CSS in WordPress
Which brings us to the right way to organize, configure, and generate CSS in WordPress. (Or at least, our way of doing it.)
Step 1: dividing our CSS into more logical/manageable chunks
Either through SFTP or through a plugin like WP File Manager, we create a bunch of stylesheets that allow us to organize our CSS data in a more logical and manageable way. Here are the files we create when building websites:
- color.css
- buttons.css
- flex-box.css
- forms.css
- layout.css
- padding.css
- reset.css
- style.css
- typography.css
- zos.css
To better organize things, we put these into an “assets” folder, where we also put other global assets (like images, fonts, and javascript files).
The content of each of these is pretty logical/obvious:
- Color: contains global selectors related to color
- Buttons: contains global styling of buttons throughout the site
- Flex-Box: contains semantic selectors that pertain to the alignment of elements using the flex-box CSS technology
- Forms: gives us a dedicated place to style up the form elements throughout the site
- Layout: contains the percentage-based base layout system (based on the trusty and bulletproof Unsemantic framework) which allow us to layout markup elements in a predictable and semantic way
- Padding: contains global classes that can be used to add padding to elements throughout the site
- Reset: contains some important reset styling which creates a predictable style baseline across browsers
- Style: the one file that can be used to target specific/one-of-a-kind elements throughout the website; importantly, these CSS selectors should be able to override more generic/global selectors found elsewhere throughout the CSS structure
- Typography: defines the styling of type, including the loading of custom (not-third party) fonts, style of different typographic elements (like headings, list items, paragraphs, block quotes, etc.)
- ZOS: contains animate-on-scroll CSS animations that can be used throughout the site
Your options here are unlimited. If you can imagine other ways to better organize your styling, go for it. The point is to divide your stylesheets into logical, predictable chunks so that finding and editing styling is as easy as possible.
Step 2: enqueuing stylesheets via functions.php
The functions.php file is like the godfather of your WordPress website. It is a massively powerful, theme-specific file that gives you a place to extend the site’s functionality.
Of course, with great power comes great responsibility. So, edit carefully! Because you can—and will—take down your entire website if you do this wrong*.
*Important note: if you’re using a WordPress theme that requires updating, you don’t want to edit the main functions.php file, because those changes will be overwritten as soon as the theme updates. Instead, use a child theme to write custom extensions. At Tilted Chair, we build custom/tailored websites that don’t rely on updates, so this isn’t an issue for us. But for those who bought or customized using a theme or a builder (like Beaver Builder, Divi, or Elementor), this is a very important note.
With that disclaimer out of the way, let’s take a look at how we render those stylesheets in WordPress.
Open the functions.php file, return to create a new line, and drop the following into the file:
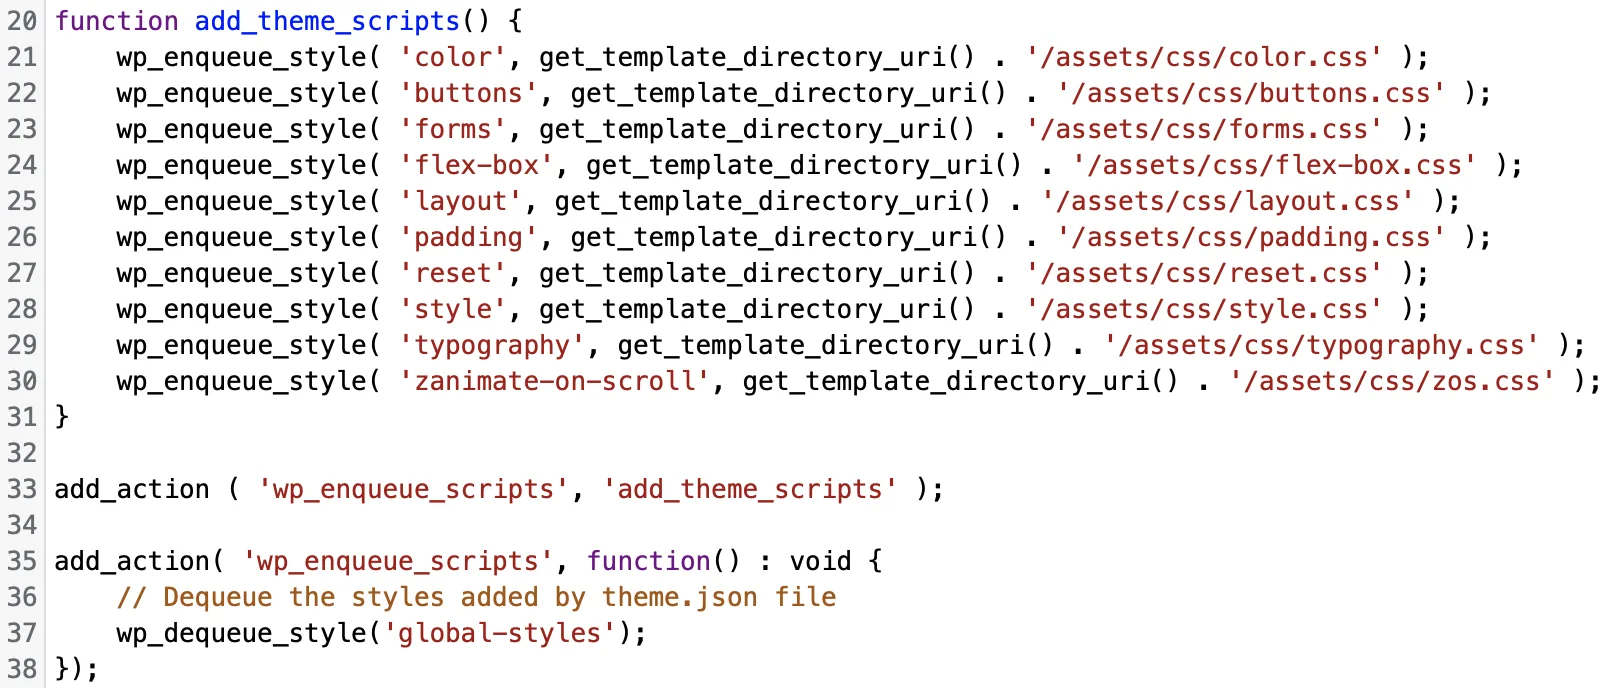
What’s going on here? We’re using the WordPress enqueue scripts function to call those custom stylesheets into the <head></head> of the website.
Bonus: the third action here (“wp_dequeue_style…”) deactivates any other legacy/latent stylesheets that might still be hanging around from our base/default WordPress theme. It also eliminates any unnecessary/superfluous CSS that our new CSS would overwrite anyway. This reduces the amount of CSS that gets read, and eliminates any potential CSS conflicts that might have otherwise occurred.
Boom!
Open your hand and pat yourself on the back, because you just enqueued (a fun word, too) CSS in a WordPress website the correct (or at least, the Tilted Chair) way.
One problem…
Having too many CSS stylesheets can have adverse effects on your site’s performance with regards to SEO.
Don’t worry!
This is where our CSS organization structure pays dividends, because it gives us the best of both worlds.
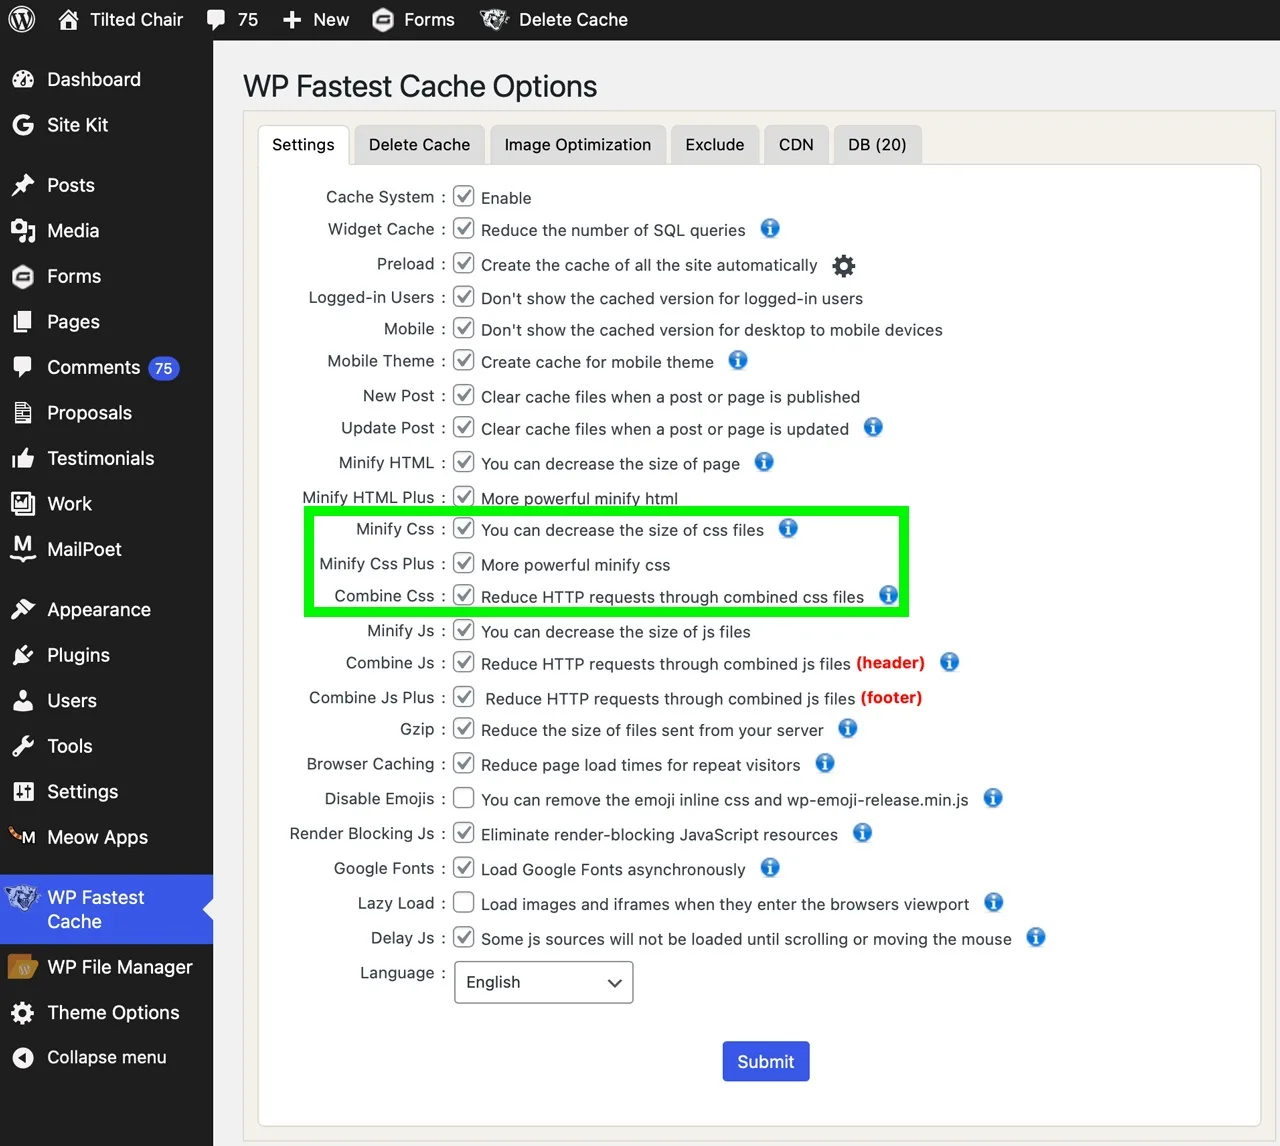
One other feature of the Tilted Chair approach to developing websites is that we build with minimal reliance on plugins. One of those, however, that we’ve found to be essential and that always seems to make the cut is WP Fastest Cache.
Why do we love it? Well, for a couple of reasons. WP Fastest Cache allows you to:
- Combine CSS into a single file
- Minify CSS
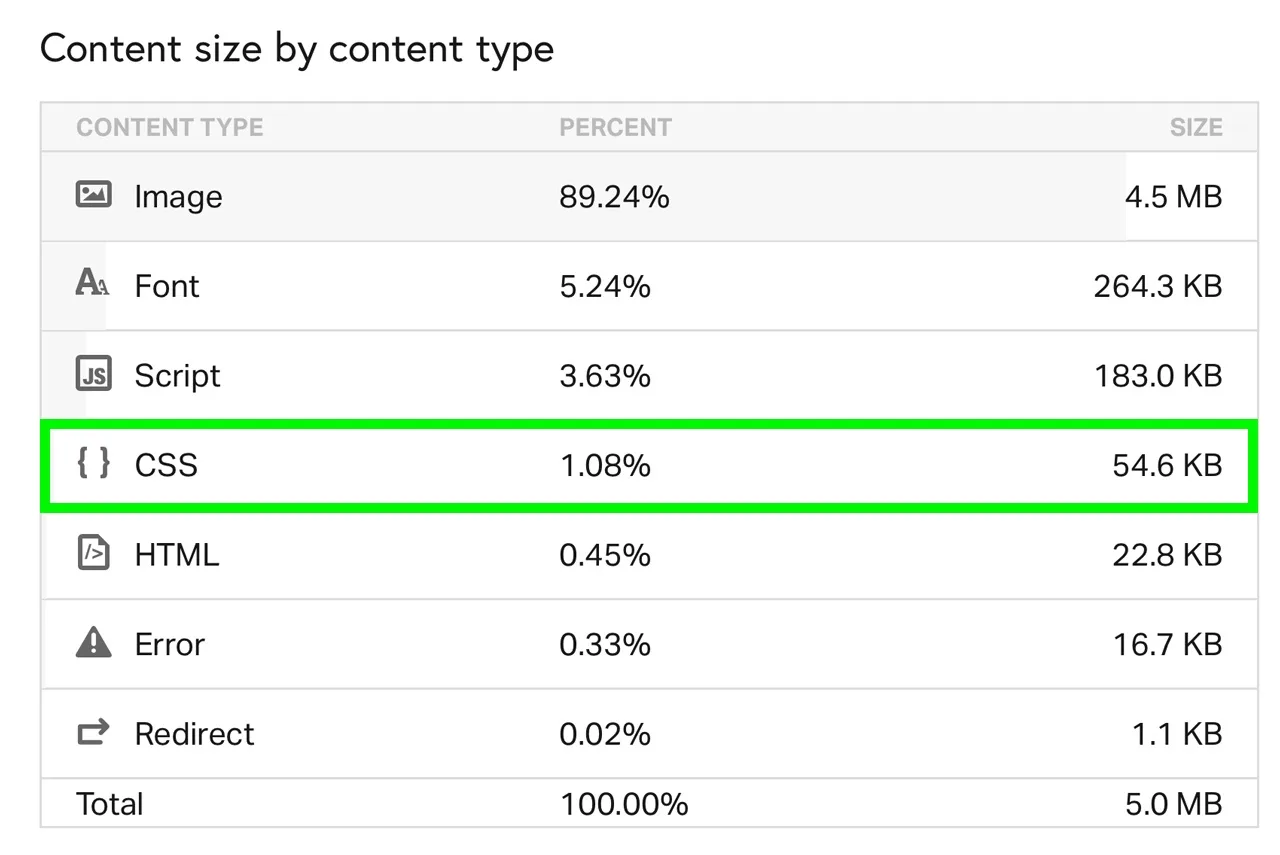
As you can now see, the Tilted Chair way of adding and organizing CSS in a WordPress website lets us have it all: for building/editing, our site’s styling is broken out into smaller, more accessible chunks that are easy to find, understand, and alter.
At the same time, that styling is then re-combined and minified into one teeny, tiny stylesheet with minimal impact on our site’s performance.
The result is that the site’s CSS is among the smallest pieces of our site’s entire data weight:
Once all of this is properly configured, think about how much easier it’s going to be to go back and add new styles to the system. Need to add a background color + text color combination? Head on over to color.css. Need to add a new font size for a particular media query? Go to typography.css. Need to fine-tune a form element? Locate the forms.css stylesheet.
The possibilities are endless, and when done right, the disorganization of styling is not.